Installation of MySql Database Server in Ubuntu 12.04

This are the steps in installing Mysql in Ubuntu 12.04

  1. Open a terminal and enter this command:
    $ sudo apt-get update && sudo apt-get upgrade
  2. Accept the updates and install mysql using this command:
    $ sudo apt-get install mysql-server mysql-client
  3. After the installation process provide a password for root user.
  4. Secure the installation by using this command:
    $ sudo mysql_secure_installation
    This will allow you to set the limitation on how you can access mysql
  5. Here is a sample log details:
    Enter current password for root (enter for none):
    OK, successfully used password, moving on…

    Setting the root password ensures that nobody can log into the MySQL
    root user without the proper authorisation.

    You already have a root password set, so you can safely answer ‘n’.

    Change the root password? [Y/n] n
    … skipping.

    By default, a MySQL installation has an anonymous user, allowing anyone
    to log into MySQL without having to have a user account created for
    them. This is intended only for testing, and to make the installation
    go a bit smoother. You should remove them before moving into a
    production environment.

    Remove anonymous users? [Y/n] y
    … Success!

    Normally, root should only be allowed to connect from ‘localhost’. This
    ensures that someone cannot guess at the root password from the network.

    Disallow root login remotely? [Y/n] n
    … skipping.

    By default, MySQL comes with a database named ‘test’ that anyone can
    access. This is also intended only for testing, and should be removed
    before moving into a production environment.

    Remove test database and access to it? [Y/n] n
    … skipping.

    Reloading the privilege tables will ensure that all changes made so far
    will take effect immediately.

    Reload privilege tables now? [Y/n] y
    … Success!

    Cleaning up…

    All done! If you’ve completed all of the above steps, your MySQL
    installation should now be secure.

    Thanks for using MySQL

  6. We have successfully install our MySQL Database Server.
  7. We will install MySql Navigator so that we can easily access our MySQL Database Server, type this command:
    $ sudo apt-get install mysql-navigator

After the installation we can now easily access our server.
Liferay Portal Jboss Runtime Server Setup in Eclipse

We already set up Liferay-Tomcat runtime server in our eclipse. But what if we want Jboss server? Currently JBoss local server adapters for Liferay servers are not supported in Eclipse IDE (http://issues.liferay.com/browse/IDE-519). The work around is to setup Jboss 7 in our Eclipse. Here are the steps:

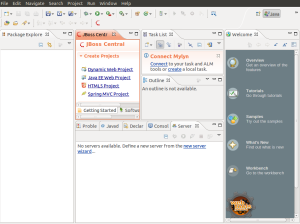
  1. In Eclipse IDE, go to Help > Eclipse Marketplace.
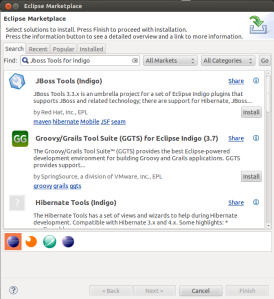
  2. On the Eclipse Marketplace window search for Jboss Tools for Indigo
  3. Click Install.
  4. Confirm the features to be included by clicking Next.
  5. Accept the license agreement and click Finish.
  6. After plugins download and install, accept that the content is unsigned by clicking OK
  7. We need to restart Eclipse for installation to take effect. Click Restart now.
  8. Jboss tools are now installed in our Eclipse IDE. 
  9. Go to Windows then Select Preferences.
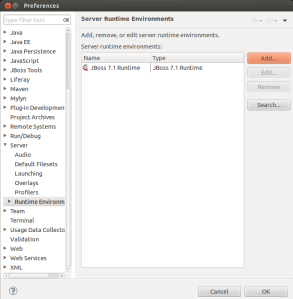
  10. On the Preferences window. Go to Server > Runtime Environment. Then click Add button.
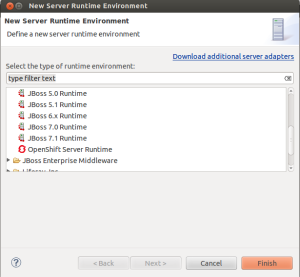
  11. On the New Server Runtime Environment, go to Jboss Folder and select Jboss 7.1 Runtime and click Next. 
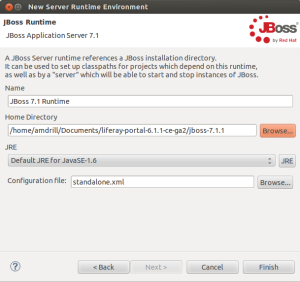
  12. Click Browse and select the jboss-7.1.1 folder on the extracted liferay portal.
  13. Click Finish. Jboss 7.1 Runtime is now in the List of our Runtime Environment. 
  14. Click Ok to save the runtime preferences.
  15. We will now add the Server. On the servers tab, right click and select New.
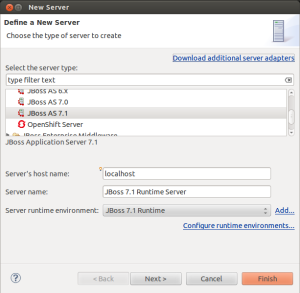
  16. Under the Jboss Community select JBoss AS 7.1. Click Finish. 
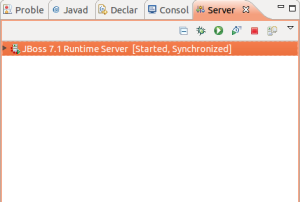
  17. On the Server tab. Select Jboss 7.1 Runtime Server and click Start. 
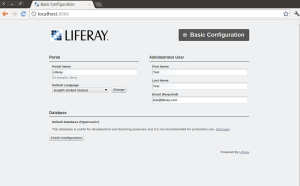
  18. Open a browser and enter this Url: http://localhost:8080/. Our Liferay Jboss Server is now up and running. 


Liferay Portal Tomcat Runtime Server Setup in Eclipse

Now we already have an Liferay IDE, and SDK plugins in our Eclipse. We will now setup the Liferay Portal 6.1 Bundled with tomcat(you can choose any servlet container or web server, for this tutorial I will choose Tomcat). Here are the steps:

  1. Download Liferay Portal 6.1 in this link: http://www.liferay.com/downloads/liferay-portal/available-releases
  2. Extract the File in your selected folder.
  3. In Eclipse. Go to Go to Window > Preferences > Server > Runtime environments. 
  4. Click Add to add a new Liferay runtime and find “Liferay v6.1 (Tomcat 7)” under the Liferay, Inc. category and click Next. 
  5. Click Browse and select the location of the liferay-portal-6.1.1.ce.ga2 directory.
  6. The Liferay Tomcat Directory field will now be populated. Click Finish. .
  7. Liferay portal runtime is now available in the list of runtimes in the preference page. 
  8. Click Ok to save the runtime preferences.
  9. We will now add the Server. On the servers tab, right click and select New. 
  10. Find the Liferay, Inc category and select the Liferay v6.1 Server and choose the Liferay v6 Runtime that we had previously created. 
  11. Click Finish. Liferay Server is now available.  
  12. Start the Server.
  13. Once the server is started. We can now access our Liferay Page by typing this address in web browsers: http://localhost:8080/ 

Hope it helps. 🙂

Credits to: http://www.liferay.com/documentation/

Intalling Liferay Plugin SDK in Eclipse

Now that we already have our Liferay IDE its now time to setup the Liferay Plugin SDK for our Eclipse. Here are the steps:

  1. Download liferay-plugins-sdk. You can download the file in http://sourceforge.net/projects/lportal/files/Liferay%20Portal/6.1.1%20GA2/, For this tutorial we will be using liferay-plugins-sdk-6.1.1-ce-ga2-20120731132656558.zip
  2. Extract the zip file using archive manager.
  3. Open Eclipse.
  4. In Eclipse (with Liferay IDE).  Go to Window > Preferences > Liferay > Installed Plugins SDKs. 
  5. Click Add.
  6. On the Add Liferay Plugin SDK Location. Click browse and select the extracted sdk folder on step 1. 
  7. Select OK and you should see your SDK in the list of Installed SDKs. 

We have now our Liferay plugin SDK in our Eclipse Indigo… 🙂

How To Install Liferay IDE in Eclipse Indigo

Tags

,

Today I have installed Liferay IDE in Eclipse Indigo using my Ubuntu 12.04 desktop. Here are the steps that I use.

  1. Install Eclipse Indigo(extract using archive manager). You can Download Eclipse IDE for Java EE Developers here: http://www.eclipse.org/downloads/packages/eclipse-ide-java-ee-developers/indigosr1
  2. Run the Eclipse Executable file 
  3. On Eclipse IDE go to Help and click Install New Software.
  4. On the Available Software Screen click Add… button.
  5. On the Add Repository screen type the following data for Name and Location field:
    Name: Liferay IDE
    Location: http://releases.liferay.com/tools/ide/eclipse/indigo/stable/
  6. Click Ok.
  7. The Added repository will now be in added in combo selection box. And Liferay IDE will now be added in the Table. Select Liferay IDE and click Next.
  8. Click Next.                     
  9. Accept the terms and license agreement and Click Finish.
  10. Plugins will now be downloaded and installed.
  11. After plugins download and install, accept that the content is unsigned by clicking OK.
  12. Restart eclipse.
  13. After you restart, go to Help then click About Eclipse and the Liferay Icon badge will be shown.

I hope that helps. 🙂
Credits to: http://www.liferay.com/community/wiki/

Liferay and Spring-Portlets

I have developed portlets for Liferay portal in my previous work. And I will be working again with Liferay in my upcoming project so i decided to create a tutorial on how to setup Liferay IDE and Liferay runtime environment and also create portlets using spring-portlets.

For those who don’t know what is Liferay, Liferay is an opensource enterprise portal that is used to power intranet and extranet. It is sometimes describe as CMS (content management system), but it is not just a CMS you can setup features in Liferay like Blogs, News and add portlets(there are already made portlets that you can include in your Liferay Portal or you can develop your own portlet.)

In creating our portlet we will be using Spring-portlet framework.

The introduction ends here. We will now setup our Liferay Portal. 🙂